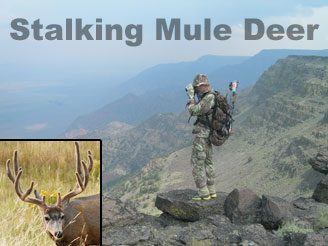
MULE DEER WERE the first big game I ever hunted with a bow,
and the sight of big sagebrush bucks was what made me a bowhunter. No wonder I
love stalking mule deer.
As western bow seasons open in August and September, I’m
sure many of you are planning your own mule deer hunts. During 40 years of
stalking muleys, I’ve learned some things you might find helpful. Mind you, I
don’t have all the answers as mule deer continue to make me look like a novice.
Still, experience has taught me some valuable lessons, and maybe some of these
lessons will work for you.
SPOTTING
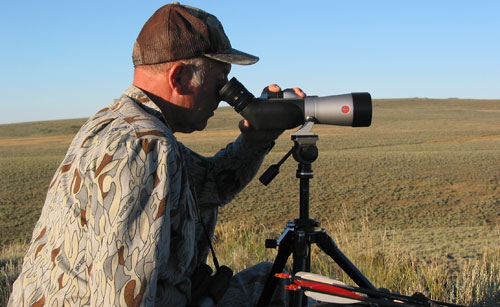
OPTICS. Stalking always starts with spotting, and for
serious mule deer hunting, you’ll never regret spending top dollar for quality binoculars.
The most popular sizes are 8x42 and 10x42. Because I wear glasses, I prefer the
8x42, but most serious mule deer hunters prefer the 10x42. Some of the top
brands are Zeiss, Leica, Swarovski, Nikon, and Leupold. Buy the best you can afford.
If you “economize,” you’ll suffer some serious eye strain and then end up
buying expensive binoculars anyway. So buy good glass to start with.
You’ll also regret buying compact binoculars, such as 8x24
or 10x24. For serious game spotting they’re worthless, most notably because
they do not gather enough light for productive spotting in dim light.
Along with standard binoculars, add a spotting scope in the
15-45x range, essential for evaluating animals at extreme distances. Again, buy
quality. To get the most out of any scope, mount it on a tripod. I far prefer a
scope with an angled versus a straight eyepiece. The angled eyepiece is much
more versatile.
Many hard-core game spotters rely on tripod-mounted binoculars
in the 15x to 20x range because using both eyes proves much easier on the eyes
than squinting with one eye through a scope. If you do use your scope for
long-term spotting, cover your off eye so you don’t have to squint.
VIEWPOINTS. Generally you will hunt mule deer in alpine,
desert, prairie, or badlands. In the alpine or desert, you might sit on a peak
or ridgetop where you can see miles in every direction. On the prairies, you
might spot from a truck window out across the flat expanses. In the badlands,
you might be looking up a single ravine. Whatever the perspective, good vantage
points are golden. Locate as many as possible, and remember them well. They are
key to your locating deer.
TIME OF DAY. When western archery seasons open in August,
deer generally feed into the open at night and then, as the sun comes up, drift
into shady, cool cover for the day. That makes the first two hours of daylight,
when the deer are still in the open and the early morning sun virtually makes
them glow, the best time to spot deer. Hike to your best vantage point before
daylight and start glassing at first light. Glass from there for at least the
first three hours of daylight.
If you don’t see a buck you want then, don’t give up; you
might spot a bedded buck during the day. In the alpine and badlands, deer lie
in shady spots under cliffs and trees, and with some diligent glassing you can
spot them in these beds. In sagebrush or grass, bedded bucks’ antlers often
stick above the vegetation. I’ve located many bucks during the heat of the day
by spotting antler tips in the sagebrush.
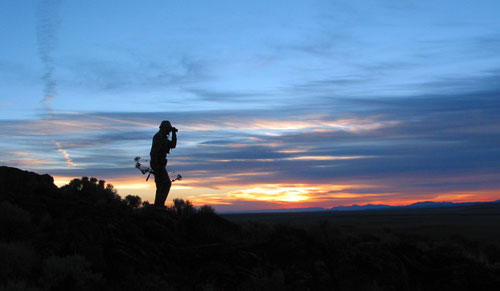
DURATION. Really successful mule deer hunters spend long
hours behind binoculars and scopes. Devote at least the first three hours of
daylight glued to your optics, then glass for bedded bucks during the day, and
finally spot during the last couple of hours of daylight to catch deer coming
out of cover for the night.
To stick with glassing, you must be comfortable. That starts
with a tripod for any optics over 10x. Some hunters prefer a tall tripod so
they can stand and glass. If you want to sit, carry a folding stool or gardener’s
knee pad to sit on while glassing. On cold mornings, pack a jacket so you can
glass without shivering, and on hot days, pack your own shade. My friend Jeff
Zennie, who guides bowhunters in the Oregon desert, carries a six-foot square
of cloth to create his own shade.
STALKING
PLANNING. Once you’ve located a buck you want, be patient.
In most cases, you’re best off to wait for the deer to bed for the day, so he’s
stationary and you have all day to get within range. With that said, some
hunters prefer to stalk feeding deer, and that works especially well if you can
ambush them as they travel from feeding to bedding sites.
Before ever leaving your spotting position, plan your
stalking route. Study the area around the deer through your binoculars or scope
to note obvious landmarks to guide you as you move in. If you have a partner,
work out hand signals, a valuable aid in sneaking within bow range.
Also, take plenty of time to locate other animals around
your target animal. If you bump into unseen deer, you’ll start a stampede. Game
over.
Above all, study grass or bushes around your quarry to
determine wind direction at his location, and figure out how to approach from
straight downwind, or, at the least, crosswind. Yes, scent eliminators help,
but when you’re baking under an August sun, sweating like a hog, you cannot
rely on them 100 percent. Get the wind in your favor. Period.
CONCEALMENT. Head-to-toe camouflage that blends with your
surroundings always helps your cause. Several companies make sage and evergreen
patterns that blend well in mule deer country.
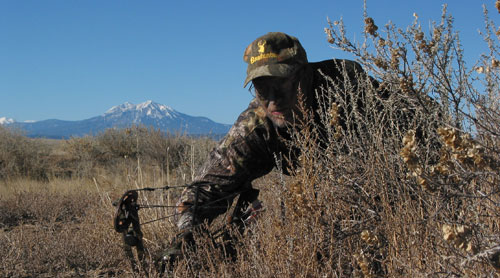
More important are how and where you move. The best stalking
motto is “Go Slow.” You might be able to hustle the first mile or two toward a
buck, but as you get close, slow down! If you move fast, even the best
camouflage won’t help; deer will see your movement. In contrast, if you move
slowly enough, you often can crawl within plain sight of deer and not be
detected. Above all, stay off the skyline. Animals can spot movement on a
skyline from miles away.
Take advantage of terrain and vegetation. On a sage flat,
you might need to crawl on hands and knees to stay below the brush line. In
shorter vegetation, you might need to belly crawl while setting your bow in
front of you a few inches at a time. On steep mountain slopes and in cliffs, you
can stalk down from above in a crouch as you peek over the cliffs below.
SILENCE. Again, this starts with clothing. For hot summer
stalking, superlight polyester fabrics, Cabela’s light Microtex garments,
ultralight fleece from Day One Camouflage, and clothing made out of “T-shirt”
weight cotton are great. They’re cool, supple, and very quiet. For cooler
weather, go with synthetic fleece, wool, and knit clothing. Any kind of nylon
and stiff, heavy cotton don’t cut it in stalking.
Lightweight shoes with soft rubber soles work best. To
improve on that, slip fleece boot covers over your shoes, and to take it one
step further (conditions permitting), take off your shoes and stalk in your
sock feet. I usually carry a heavy pair of wool socks in my pack specifically
for stalking.
Again, the “Go Slow” motto applies. As you get within 100
yards or closer, deer will hear any sound you make. To remain silent, place your
hands and feet slowly and deliberately. It’s all about time. If you take enough
time, you can creep within bow range of virtually any deer.
SHOOTING
NOT TOO CLOSE. The closer you get, the more likely a deer is
to sense your presence, and the more explosively it will react. Also, the
closer you get, the more intense the situation and the more nervous you’ll get.
So I suggest you get within your effective range and stop. If your sure-kill
range is 30 yards, stop there; if it’s 20, stop there. Then wait for the animal
to present a shot.
LET HIM STAND. In some cases you might be able to shoot a
bedded buck, especially if he’s lying under a cliff or tree in steep terrain.
But in flatter country, you probably won’t get a clear shot at a bedded deer.
In virtually all cases, you’ll do best to wait for the deer to rise to feed or
stretch on its own. That gives you a shot at a calm, unaware animal.
In a squirrelly wind, you might want to make something
happen before the animal smells you. I’ve had success flipping rocks to make
animals stand up, but this takes caution. One windy day in Nevada, a buck
couldn’t hear the rocks hitting the ground, so I tried throwing closer — and
hit him in the head. I didn’t get that one.
GET THE RANGE. If you shoot with sights, a laser rangefinder
helps immeasurably, but never think it’s foolproof. In the Hoback region of
Wyoming I tried to range a buck at 40 yards, but strands of grass kept throwing
off the reading. As I tried to get a clear reading, the buck saw me move and headed
for a different mountain range. To avoid that, range off objects around the
deer while he’s still bedded, and be ready to shoot at the first good
opportunity.
COOL IT. The emotional pressure of stalking can be
overpowering. When you’re sitting 15 feet above the ground in a treestand, you
can look down on animals with almost calm detachment. But when you’re within
spitting distance of a big muley buck at eye level, the atmosphere is electric.
As much as you want to hurry the shot, take your time. Be
patient! When the shot seems imminent, take some deep breaths and go through
your normal shot routine. Control your emotions long enough to make a dead-on
shot. You’ll have plenty of time to celebrate your stalking success after your
buck hits the ground.
 |
About Dwight Schuh
Dwight began bowhunting and writing outdoor stories in 1971. For 25 years he made his living as a freelance writer, and for the past 16 years, until his retirement on May 31, he has served as Editor for Bowhunter magazine. He continues on with the magazine as Hunting Editor. He has taken 23 species of North American big game. To prepare for his hunting adventures, he has become a self-professed gym rat.
For complete details on stalking mule deer, check out
Dwight’s book, Hunting Open-Country Mule Deer at dwightschuh.com.
|